
Code review walkthrough: record it on your screen in Chrome
Record a code review walkthrough in Chrome: open the diff, talk through your feedback, and send the author an MP4 with a transcript they can skim.
Written comments are fine for a typo. They are slow for a design question. If you want to record a code review walkthrough on your screen, you can open the diff, talk through what you see, and hand the author a video and a transcript instead of forty small comments. This post shows how to do it in Chrome with Cheap Recorder, with a worked example you can copy.
Why record a code review walkthrough instead of writing comments
Comments strip out tone and order. A reviewer who writes "why this?" on line 82 may mean curiosity, concern or a blocking issue. Your voice carries that. The author hears it in one pass.
A walkthrough also keeps the order of your thinking. You can say "start with the data model, then look at the handler, then the tests", and the author follows the same path you did. With inline comments, they arrive in file order, which is not always the order that makes sense.
The author can pause and replay the file, and skim the transcript. Nobody has to sit in a meeting.
When a video code review works best
Video is not for every pull request. Use it when:
- The change is large and the reviewer needs to explain how the pieces fit.
- You have a design concern that would take a long comment thread to explain.
- The author is new to the codebase, and you want to show where things live. The same habit works for a product walkthrough for a new teammate.
- You are reviewing across time zones and a live call is hard to arrange.
Skip it when the feedback is a handful of one-line fixes. Write those as comments.
Prepare your pull request and screen before you hit record
- Read the diff first. Do not discover the change while recording. Know which files matter.
- List your points in order. Three to six bullets in a scratch note is enough. Put the blocking ones first.
- Open only what you need. Anything on the shared screen ends up in the file. Close chat apps, silence notifications and shut tabs you do not need.
- Decide what to share. Sharing one window or one browser tab keeps other tabs, apps and private things out of the recording. If you review in the browser, share that tab. If you review in your editor, share that window.
- Check for secrets. If the code or your terminal could show keys or customer data, close those windows first.
How to record a code review walkthrough on your screen in Chrome
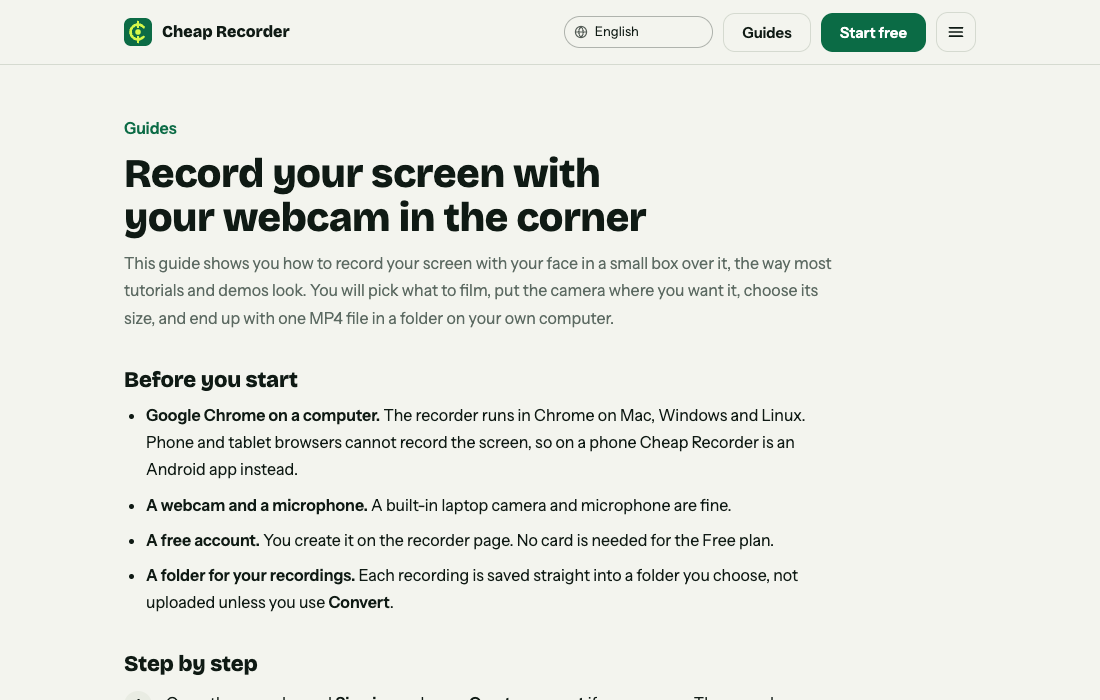
Cheap Recorder runs in Google Chrome on macOS, Windows and Linux. You do not install anything. The steps below use the free plan.
- Open the recorder and sign in. Open
cheaprecorder.com/app/in Chrome and sign in. - Choose a folder. Press Choose folder... under Where to save. Chrome asks whether the page may edit files in that folder, and you allow it. Until you do, Start recording stays greyed out and the note beside it says choose a folder first.
- Name the recording. Type something you will recognise later, such as
PR 482 review billing retries. The name is used for the file and its folder, and the date and time are added. - Pick what to capture. Under What to capture, choose A window or A browser tab. Chrome opens its own sharing box. Pick the window or tab with the diff and press Share. If you want to be heard clearly, check that the microphone you speak into is ticked under Change or add microphones.
- Decide on the camera. Record my webcam is optional. If you leave it on, the default layout is Picture in picture, bottom right. You can drag the camera anywhere and set its size with the Size slider. If you want a clean screen, switch the webcam off or pick the Screen only layout. The screen and webcam guide covers the layouts in detail.
- Do a 30 second test. Record a short clip, play it back, and make sure your voice is there. This catches a wrong microphone early.
- Press Start recording. When it can start, the note reads ready to record.
- Press Stop and finish when done. Do not use Chrome's own Stop sharing bar. Pressing it also ends the recording, but Stop and finish is the clean way to close it.
The recording is written to your folder about once a second as you go, so a long review does not pile up in memory. When you finish, you get an MP4 with H.264 video and AAC sound that plays almost anywhere.
Mark each file as you go
Press M or Add marker when you move to a new section, for example when you open the handler and when you open the tests. A short note confirms the time. Markers are only saved to files if you tick Also save every source separately under Options before you start. With the default single MP4, the notes show while you record but are not saved, so jot down times if you need them.
Narrate your feedback: what to say and in what order
A good review recording is short and structured. Aim for a few minutes, not a lecture. Here is an order that works:
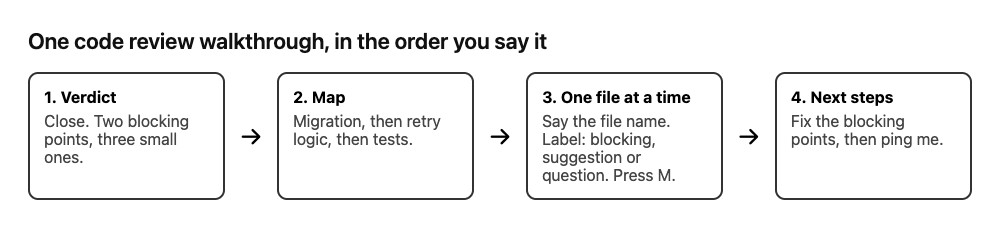
- Say the verdict first. "Overall this looks close. I have two blocking points and three small ones."
- Give the map. "I will go through the migration, then the retry logic, then the tests."
- Take one file at a time. Scroll to the lines you mean. Say the file name out loud, because it helps the transcript and the listener.
- Say why, then what. "This retry loop has no upper limit, so a failing payment could keep trying. I would cap it at a fixed number of attempts."
- Label each point. Say "blocking", "suggestion" or "question" before you explain it. The tone problem of written comments goes away when you say it.
- End with next steps. "Fix the two blocking points, then ping me and I will take another look."
If you stumble, pause and repeat the sentence. You can cut the mistake later in the transcript. The advice in recording a voiceover in one take applies here too.
Share the recording and link it in your pull request
Your recording is a normal file in a folder on your own computer. Cheap Recorder does not upload it. That means you decide where it goes. Put it wherever your team shares files, then paste the link into the pull request with a short summary, such as the verdict and the blocking points in text. The summary matters. Some people will read the text first and only watch if they need detail.
If you are on Creator or higher, there is another route. Tick Also save every source separately before recording. The recording's Separate sources folder then holds a publish.html page. It shows the title, a player, one chapter per marker, and the transcript with times and speaker names. It opens from the folder with nothing to host, so you send the whole recording folder as a zip, not just the page. This is the same page used for client demos. You cannot add it after the recording if you did not tick the option.
Because chapters come from your markers, the page lists one chapter for each part of your review, such as the handler and the tests.
One caution: a code review can show private code. Anyone who gets the file can see everything on the shared screen, so share it only with people who should see that code.
Use the transcript to turn spoken feedback into action items
Live transcript is ticked by default under Options, and it is on the free plan. When you finish, the card offers Captions .srt and Transcript downloads if speech was caught. The folder also holds a plain text file named after the recording, such as PR 482 review billing retries - transcript.txt, with the time of each line.
Use it like this:
- Open the text file and copy your blocking points into the pull request as a checklist.
- Use the times to link to a moment: "see 04:12 in the recording".
- Paste it into your notes if you want a written record of the decision.
Two things to know. Chrome sends your microphone audio to Google to turn it into text while the live transcript is on, so if the recording must not leave your computer in any form, untick Live transcript before you press Start recording. And if the transcript was off, you cannot add one afterwards. The live transcript guide explains the 25 languages and how to fix a wrong word.
If you said a lot of ums, the filler word tool lets you mark and cut words in the transcript on plans that include it. In a normal one-file recording, that changes the transcript and captions but not the MP4. The filler words guide covers the full route to a cut video.
Frequently asked questions
Can I record a code review without showing my face?
Yes. Switch off Record my webcam, or pick the Screen only layout, and the file holds just your screen and your voice.
How long can a code review recording be?
The free plan gives you 12 hours of recording a month. If the month's minutes run out mid-recording, the recording stops, so open your name in the top right to see how many are left.
Does the recorder upload my code?
No. The recording is saved to a folder you choose on your computer. Files are only sent to the Cheap Recorder server if you press Convert or Download MP3, and that copy is deleted when it finishes. The recorder's activity log does hold the folder and file names you chose, so avoid putting a secret in a recording name.
Do I need an editor to fix mistakes?
No. Pause, repeat the sentence and carry on. Cheap Recorder is not an editing suite, so keep the take short and clean rather than planning to fix it later.
Can the author get my comments as text?
Yes, if Live transcript is on. You get a plain text transcript in the folder and can download captions as an .srt file from the card.
Get started
Pick your next large pull request, read the diff, write your points in order and record a first walkthrough. Keep it under ten minutes. For more on short team videos, see how to record a product update with a transcript.
The free plan needs no card. Start recording with Cheap Recorder in Chrome, and your recordings stay on your own disk.